
Amazon QuickSight – Adding Calculated Fields
Adding calculated fields to an analysis
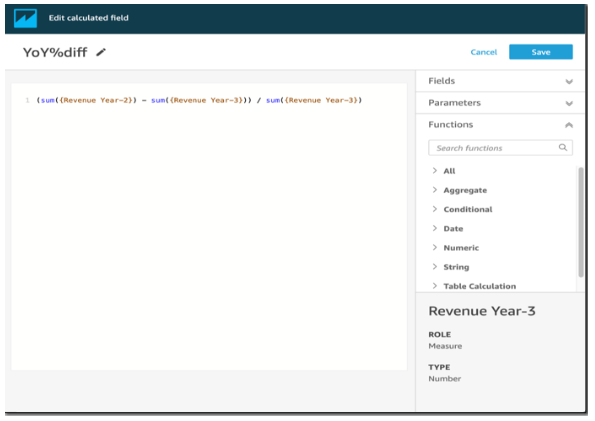
An analysis can be enhanced by adding a calculated field
- Choose Add at the top left of your analysis, then select Add calculated field.
- Follow these steps in the calculations editor that opens
- The calculated field should have a name.
- You can use fields from your dataset, functions, and operators to create a formula.
- Choose Save when you are finished.
Adding calculated fields to a dataset
Calculated fields can be added directly to a dataset. Anyone who uses the dataset can access the fields you add. Additional calculated fields can be added to the dataset when used in an analysis. Adding fields to an analysis makes them available only to that analysis.
A calculated field can be added or edited for a dataset
- You will need to open the dataset you wish to work with.
- Choose one of the following options on the data prep page:
- Choose Add calculated field at the left to create a new field.
- You can edit an existing calculated field by selecting it from the Calculated fields menu at the left, then choosing Edit from the context menu (right-click).

- Enter a descriptive name for Add title in the calculation editor. It appears in the dataset’s field list, so it should look like the other fields. In this example, we will name the field Total Sales This Year.
- (Optional) Describe what the expression does by enclosing text in slashes and asterisks.


- Decide which metrics, functions, and other items to use. In this example, we need to identify the following:
- Metrics to use
- There are two functions: ifelse and datediff
The statement should read, “If the sale happened during this year, show the total sales, otherwise, show 0.”
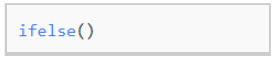
To Open the Functions list and add the ifelse function. To close the list of all functions, select All. The function groups should now appear: Aggregate, Conditional, Date, etc.
To add ifelse to the workspace, choose Conditional and then double-click it.

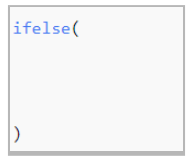
- In the workspace, place your cursor inside the parenthesis and add three blank lines.

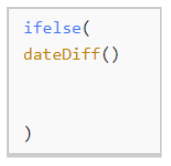
- Position your cursor on the first empty line and locate the dateDiff function. This function can be found under the Dates category in the Functions list. Alternatively, you can search for it by typing “date” in the Search functions field. The search results for “date” will display all functions that include “date” as a part of their name. However, not all functions under the Dates category will appear, such as the “now” function, which is absent from the search results.
To add the dateDiff function to the first empty line of the ifelse statement, simply double-click on it.

- Insert the parameters required by the dateDiff function. Position your cursor within the parentheses of dateDiff to begin adding date1, date2, and period:
- For date1: The first parameter is the field containing the date. Locate it under Fields, and add it to the workspace by double-clicking or typing its name.
- For date2, insert a comma, then select truncDate() from Functions. Inside its parentheses, include period and date in the following format: truncDate(“YYYY”, now()).
- For period: Add a comma after date2 and input YYYY. This represents the period for the year. To view a list of all supported periods, locate dateDiff in the Functions list, and click on Learn more to access the documentation. If you are currently viewing the documentation, refer to the dateDiff section.
Optionally, include some spaces for better readability. Your expression should resemble the following example:
dateDiff(dateField, truncDate("YYYY", now()), "YYYY")Replace dateField with the actual name of the date field in your dataset.


- Define the return value. In our example, the first parameter in ifelse should return a value of TRUE or FALSE. Since we want the current year and are comparing it to this year, we specify that the dateDiff statement should return 0. The if portion of the ifelse evaluates as true for rows where there is no difference between the year of the sale and the current year.


To create a field for TotalSales for last year, you can change 0 to 1.
An alternative method involves using addDateTime instead of truncDate. For each previous year, you modify the first parameter for addDateTime to represent each year. In this case, use -1 for last year, -2 for the year before that, and so on. If you employ addDateTime, maintain the dateDiff function at 0 for each year.
![]()

Replace {Date} and {Discharge Date} with the actual names of the date fields in your dataset.
- Place your cursor on the first blank line, just below dateDiff, and add a comma.
For the then part of the ifelse statement, we need to select the measure (metric) that contains the sales amount, TotalSales.
To select a field, open the Fields list and double-click a field to add it to the workspace. Alternatively, you can type the name. Enclose names containing spaces with curly braces { }. Your metric might have a different name. You can identify a metric by the number sign (#) in front of it.
Your expression should now resemble the following:
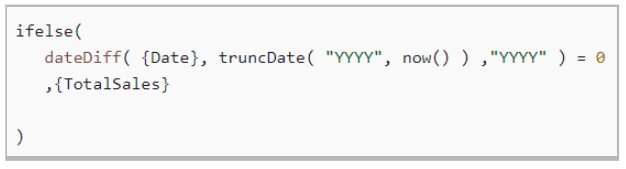

- Include an else clause. Although the ifelse function doesn’t necessitate one, we’ll add it for our purposes. For reporting purposes, it’s generally better to avoid null values, as rows with nulls might be excluded at times.
We set the else part of the ifelse to 0. As a result, this field has a value of 0 for rows containing sales from previous years.
To accomplish this, add a comma on the blank line followed by a 0. If you included the comment at the beginning, your completed ifelse expression should appear as follows:

